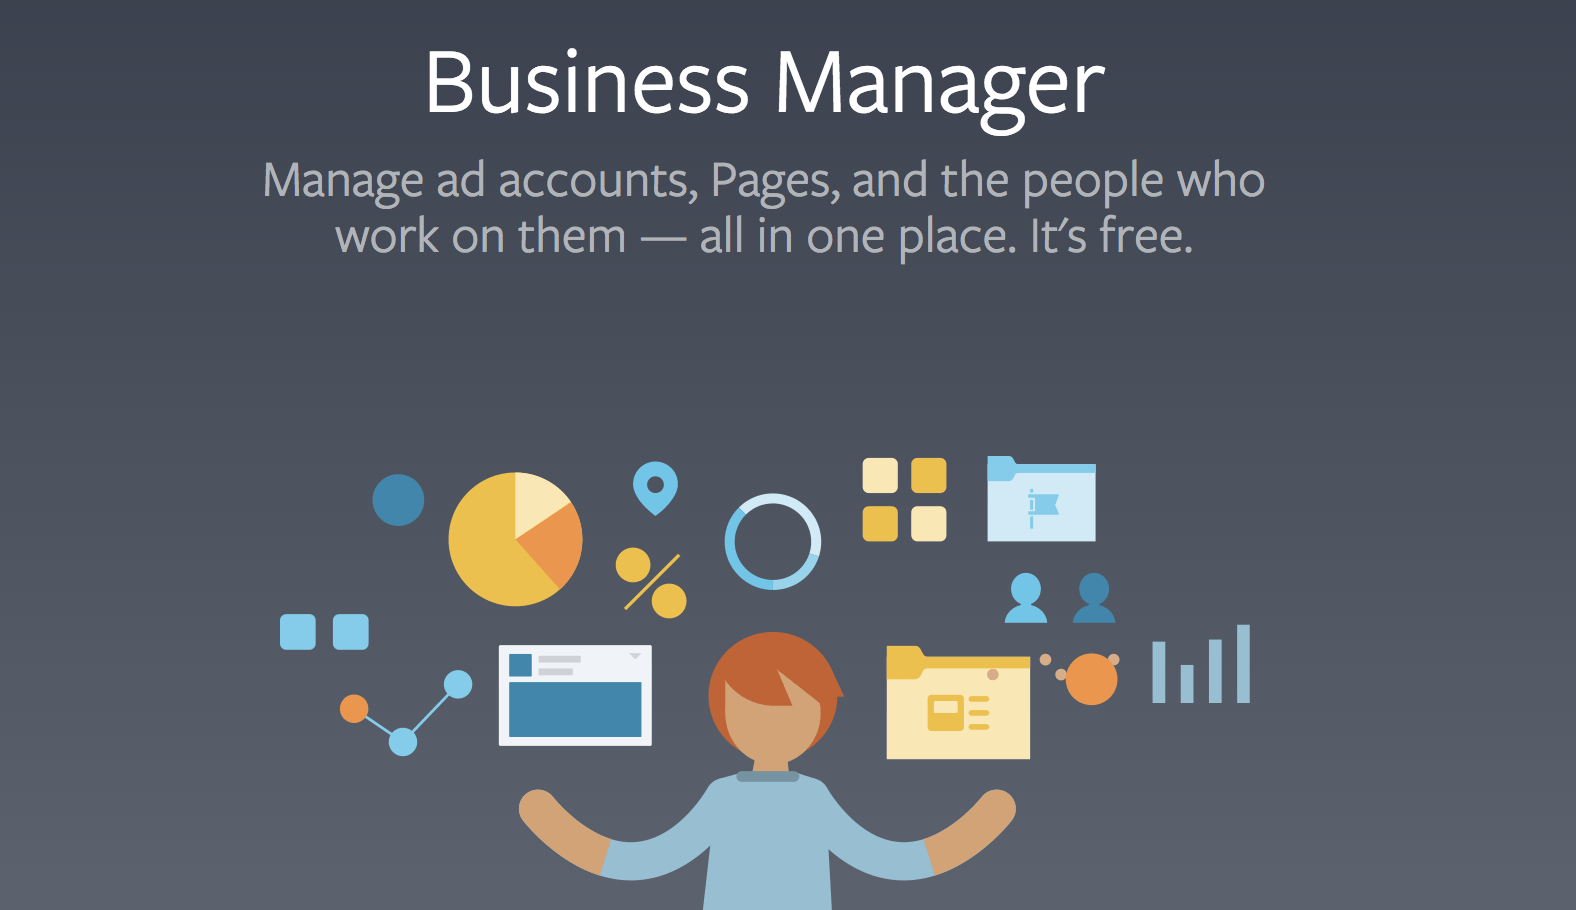
Facebook provides all advertisers with the ability to organise and manage all of your business’ assets such as Facebook Page, Instagram Business Profile, Ad Account(s) and people who manage them, in one central place – Business Manager.
Managing many Facebook Pages and ad accounts can be proven to be a rather tedious task, especially if you have many people working in many and different accounts and Pages, which translates to different access levels. If you have been in the game of Facebook ads for quite some time, chances are that you have heard of Business Manager. In this tutorial we will go through the process of creating a Facebook Business Manager and explain its various options that offers to Facebook advertisers.
Creating your Business Manager
Business Manager will serve as a central hub where all of your assets will be organised in and can share permissions to partners. You will need one in the case that:
- You want to manage multiple assets (Facebook Page, Instagram business profiles, Ad Accounts etc)
- An agency will be running the ads for you
- You need to manage user access to the right people and right credit lines
- You have more than one person managing your Facebook or Instagram Profiles
To get started with the creation of Business Manager visit https://business.facebook.com.
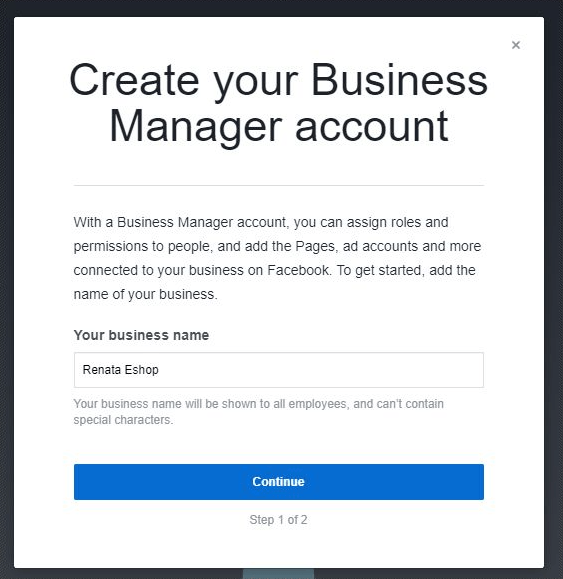
Click on the “Create account” button.

Enter an name for your business, preferably your domain name and insert your full name and email and click on the “Finish” button.
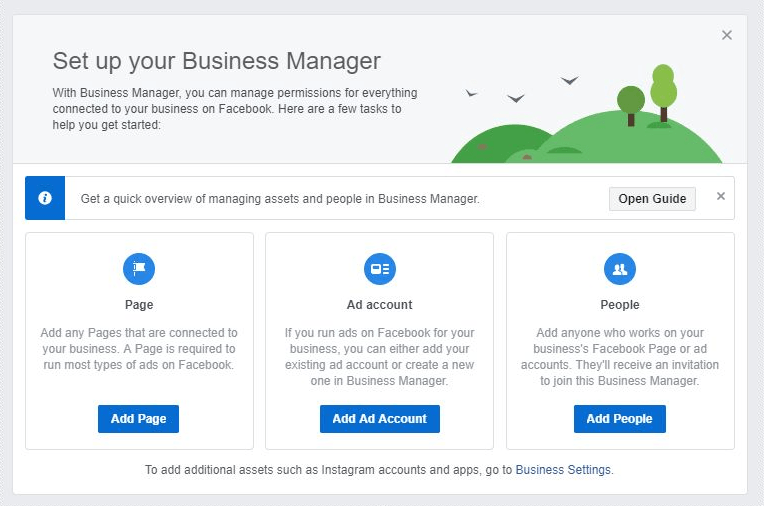
Upon providing the information you will be redirected to Business Manager’s Dashboard. Here, you can set up all the basic assets (Pages and Ad Accounts) and also grant and manage the access levels of the people that you will be working with. In order to add assets other than these you need to do so through your Business Manager’s settings.
Adding people to your Business Manager
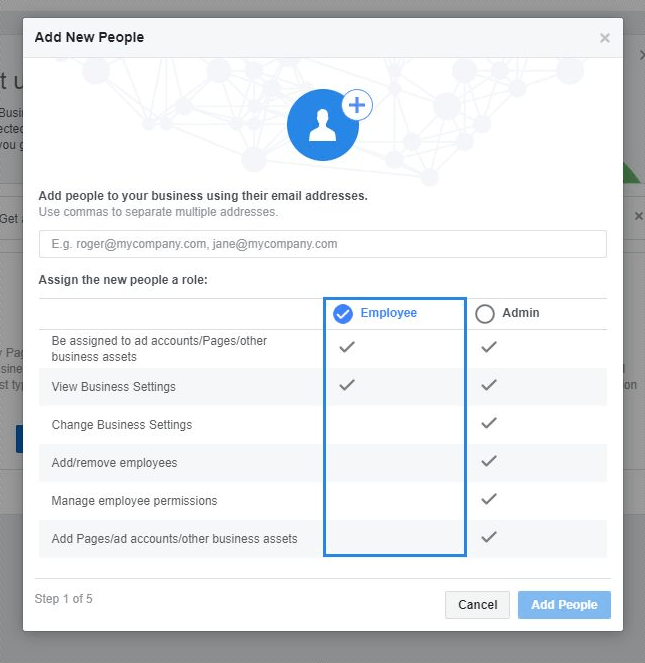
![]() Add anyone who works on your business’s Facebook Page or ad accounts. You need to provide an email where the invitation will be sent too. Have in mind two things: The email shouldn’t necessarily be the person’s personal email. It can, and it it’d be best, if you use their work email. The second thing that you need to have in mind is that the person needs to have a personal Facebook Profile., in the case that they don’t have one they will be prompted to create one prior to accepting your invitation. This helps Facebook verify their identity. Once they accept your invitation to join this Business Manager you can assign them to your business’ assets.
Add anyone who works on your business’s Facebook Page or ad accounts. You need to provide an email where the invitation will be sent too. Have in mind two things: The email shouldn’t necessarily be the person’s personal email. It can, and it it’d be best, if you use their work email. The second thing that you need to have in mind is that the person needs to have a personal Facebook Profile., in the case that they don’t have one they will be prompted to create one prior to accepting your invitation. This helps Facebook verify their identity. Once they accept your invitation to join this Business Manager you can assign them to your business’ assets.
Adding Pages to your Business Manager
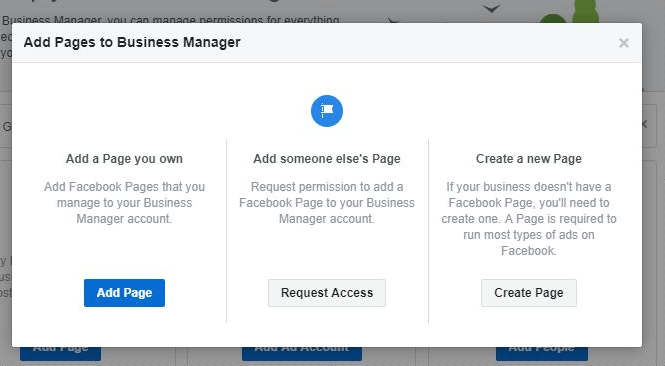
![]() Use this option to add any Pages that are connected to your business. You need to provide the name or the URL of the Facebook Page(s) you own. In the case that you do not own one you can either create via the “Create Page” button or request access to it by clicking on the respective button. Adding a Page is required as it is needed in order to run most types of ads on Facebook.
Use this option to add any Pages that are connected to your business. You need to provide the name or the URL of the Facebook Page(s) you own. In the case that you do not own one you can either create via the “Create Page” button or request access to it by clicking on the respective button. Adding a Page is required as it is needed in order to run most types of ads on Facebook.
Adding ad accounts to your Business Manager
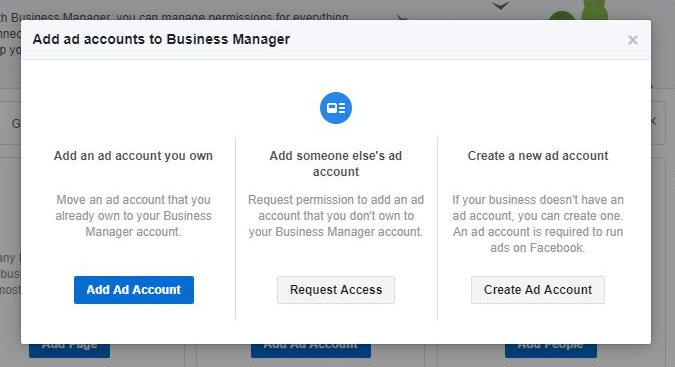
![]() Here you have similar option as in Add a Page. You can create, add or request permission to access an ad account.
Here you have similar option as in Add a Page. You can create, add or request permission to access an ad account.
If you run ads on Facebook for your business, you can either add your existing ad account or create a new one in Business Manager.
Have in mind that if you are working with multiple ad accounts they should all be in good standing. Having some ad accounts in bad standing or under review may not allow you to create any new accounts.
Adding Apps to your Business Manager
![]()
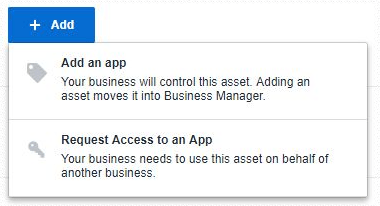
If you have an app that you’d want to promote, you need to add it to your Business Manager. By clicking on the “Apps” tab you can either “Add a new app” or “Request Access to an App” by clicking on the respective button.
Next, enter the Facebook App ID. Have in mind that if you cannot see it this means that either the app has been added by another Business Manager or you are not the admin on the Facebook for Developers.
Once you’ve successfully added your app you can assign an ad account and run ad campaigns for it.
Adding a Pixel to your Business Manager
![]() The Facebook pixel is a piece of code that’s placed on your website to report conversions, build audiences and get insights about how people are using your website. Bare in mind that there’s a limitation of 10 pixels per Business Manager account.
The Facebook pixel is a piece of code that’s placed on your website to report conversions, build audiences and get insights about how people are using your website. Bare in mind that there’s a limitation of 10 pixels per Business Manager account.
![]()
Head over to Business Manager’s settings. Under the “People and Assets” tab locate the Pixels tab. Click on the “+Add” button and choose create. Upon creating the pixel you will be prompted to set it up you can either do so now or choose to continue managing your business.
![]()
In this tab you can also assign the Ad Account you want your Pixel to be associated with or who will have access to it by clicking on the “Assign Ad Accounts” and “Assign Partners” respectively.
Adding a Product catalogue to your Business Manager
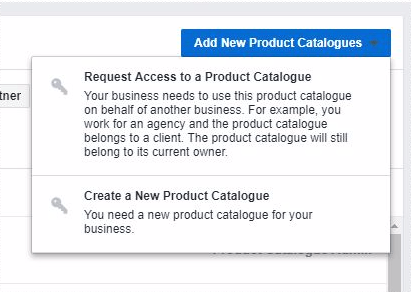
![]() In the case that you will be running Dynamic Product Ads you need to create a product catalogue first. A product catalogue can be suitable for e-shops, or businesses that offer flights, housing and accommodation, vehicles or travel destinations. Even if you aren’t operating in any of those sectors, you can still find a creative way to use DPAs as long as you are willing to experiment.
In the case that you will be running Dynamic Product Ads you need to create a product catalogue first. A product catalogue can be suitable for e-shops, or businesses that offer flights, housing and accommodation, vehicles or travel destinations. Even if you aren’t operating in any of those sectors, you can still find a creative way to use DPAs as long as you are willing to experiment.
Click on the “Add” button and choose the option that better describes your case.
For more instructions on how to create a new Product Catalogue check out my detailed tutorial on Dynamic Product Ads.
Adding your Instagram Account to Business Manager
![]() Depending on the business field you operate in you might find that having a presence on Instagram makes sense. In that case you will need to add an Instagram account for advertising. To do so, navigate to the Instagram Accounts Tab, click on the “Add” button and fill in your account’s credentials. Once you have added your Instagram account, you will want to connect it to your ad account. To do so, click on the desired Instagram account and then “Assign Ad accounts”. Have in mind that both Instagram and Ad account need to be under the same Business Manager for you to make the connection. Should you wish to delete it at some point in the future here’s the place you can do so. Find and click on your Instagram account and then click on “Remove”.
Depending on the business field you operate in you might find that having a presence on Instagram makes sense. In that case you will need to add an Instagram account for advertising. To do so, navigate to the Instagram Accounts Tab, click on the “Add” button and fill in your account’s credentials. Once you have added your Instagram account, you will want to connect it to your ad account. To do so, click on the desired Instagram account and then “Assign Ad accounts”. Have in mind that both Instagram and Ad account need to be under the same Business Manager for you to make the connection. Should you wish to delete it at some point in the future here’s the place you can do so. Find and click on your Instagram account and then click on “Remove”.
Adding domain(s) to Business Manager
![]()
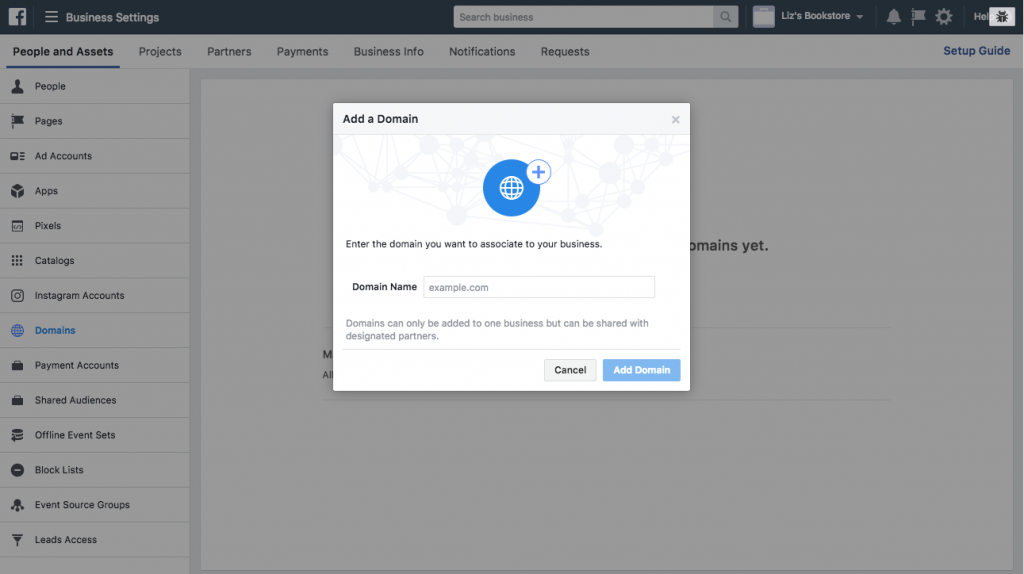
Domain Verification is a way for you to claim ownership of your domain in Business Manager. By doing so, you will be able to control editing privileges of your links and other content to prevent misuse of your domain.
Click on “Domains” option on the left and choose “Add a Domain”. Once you add it you can choose the method you wish to use to verify your domain: DNS Verification or the HTML File Upload.
Although it is not required to verify your domain, you may want to do so since in early Q1 2018, only verified domain owners will be able to edit their link posts.
Viewing shared audiences in Business Manager
![]() Here you will find and view all the audiences that are owned by you or shared with you. You can share Custom and Lookalike Audiences between two ad accounts as long as both the sharer and recipient are tied to a Business Manager.
Here you will find and view all the audiences that are owned by you or shared with you. You can share Custom and Lookalike Audiences between two ad accounts as long as both the sharer and recipient are tied to a Business Manager.
Adding offline event sets to Business Manager
![]() Offline events are a way for you to track and measure the impact of your ads in the offline world. To do so, you need to upload data about your offline events and customers to Facebook.
Offline events are a way for you to track and measure the impact of your ads in the offline world. To do so, you need to upload data about your offline events and customers to Facebook.
Select Offline Events from the left menu and click “Create Offline Event Set” to create a new offline event set. Fill in a name and a desctription for your event set, and then click “Create”. Choose the ad accounts you want to assign your event set to for tracking. In the case that you have no add account you will get the following screen.
![]()
Once you are done, you can assign ad accounts, add people and assign partners. Check our detailed tutorial on how to utilise Offline Events for your business.
Adding custom conversions to Business Manager
![]() Facebook allows you to set up and track conversions on your website in order to measure and optimise the performance of your ad campaigns. Besides tracking the 9 standard event,s you can create up to 100 custom events. You of course need a Pixel in place prior to creating custom conversions.
Facebook allows you to set up and track conversions on your website in order to measure and optimise the performance of your ad campaigns. Besides tracking the 9 standard event,s you can create up to 100 custom events. You of course need a Pixel in place prior to creating custom conversions.
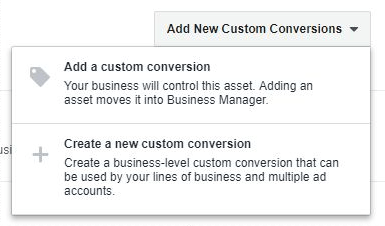
Click on “Custom Conversions” and then on the “Add” button. Next, choose the Pixel you want and set up the appropriate rules for your custom event. Fill in a name, a category and a value (optional) and click “Create”. As with all assets we’ve examined, you can assign partners and ad accounts or choose to remove it.
Adding Block Lists to Business Manager
![]() Block Lists is one of Facebook’s features that helps Facebook advertisers get more control over where their ads run. In order to be able to create a Block List you first need to have an ad account in place. Prior to creating a blocking list you need to create a .csv or .txt file that contains the URLs to the websites, or Facebook Pages that you want to exclude. Then head over to Block Lists tab and click on the Create Block List button.
Block Lists is one of Facebook’s features that helps Facebook advertisers get more control over where their ads run. In order to be able to create a Block List you first need to have an ad account in place. Prior to creating a blocking list you need to create a .csv or .txt file that contains the URLs to the websites, or Facebook Pages that you want to exclude. Then head over to Block Lists tab and click on the Create Block List button.
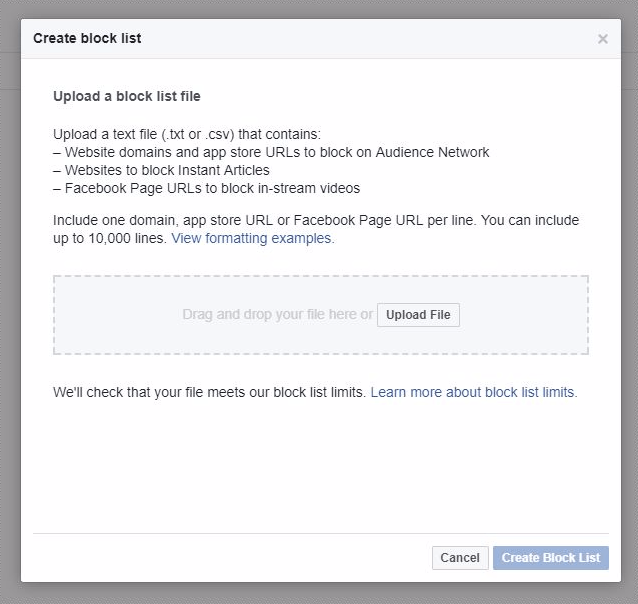
Upload your list and click the Create Block list under Manage block lists. Find and choose your file.
Once the file is uploaded you will see it appear under Manage block lists. You can either rename it or click on it to reveal the contents. Here, you can either export it or choose to replace it with a more recent version.
Adding Event Source Groups to Business Manager
![]() It is important to note that in order to use this feature you need to be an admin in the Business Manager. Event source groups is ideal for anyone that has multiple websites and/or multiple apps that use different IDs and want to combine their data together and measure activity across all platforms. Note that in the case that you are using the same app ID in your Android and/or iOS app, messenger bot, or website (using Facebook SDK for JavaScript to log events) an Event Source Group isn’t necessary.
It is important to note that in order to use this feature you need to be an admin in the Business Manager. Event source groups is ideal for anyone that has multiple websites and/or multiple apps that use different IDs and want to combine their data together and measure activity across all platforms. Note that in the case that you are using the same app ID in your Android and/or iOS app, messenger bot, or website (using Facebook SDK for JavaScript to log events) an Event Source Group isn’t necessary.
In order to add an Event Source group you need to click on the Event Source Groups tab and click on the “Add” button. Name the group and choose the app(s), Facebook Pixel(s), and Page(s) you want to bundle up.
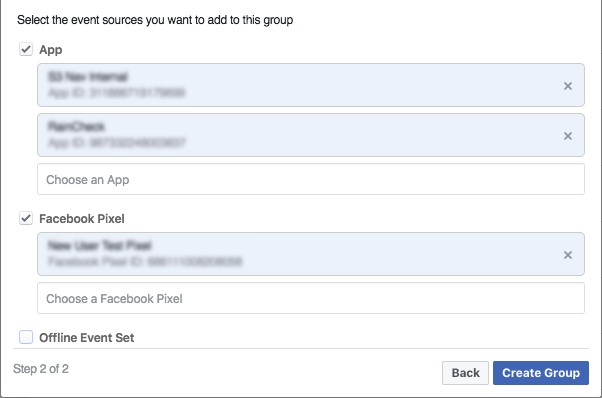
You can utilise the edit (pencil) option right next to your Event Source Groups’ name in order to modify your event sources.
Projects
Project are a great way to organise your assets (ad accounts, Facebook Pages, Instagram accounts, Pixel(s) etc.) within Business Manager. Projects can be used for different business divisions withing your company or you can organise your projects by region/location in the case that you operate in more than one locations. Projects are an easy, hassle-free way to assign permission on a set of assets in one step.
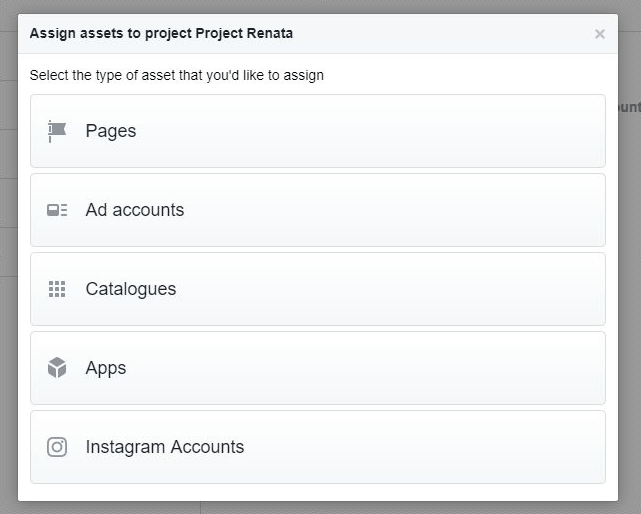
In order to create a Project, navigate to the “Project” tab and
Have in mind that each asset can only be added to one project. In the case that you make a change on asset within a project you can always change them later.
Partners
Although Partners are similar to People and both entities can perform the same actions, usually a Partner is another Business Manager account with its own set of people, Pages, Pixels etc. that have access to work on a specific asset transferred to Business Manager. When you assign someone with a Business Manager as a Partner their admin will be able to assign individual People from their own Business Manager to work on it.
Payments
One thing that you will find in Business Manager is that you can create new ad accounts and connect different payment methods to them as opposed to ad accounts. This may be a good option for you if you want more control over which payment methods get charged for different advertising costs.
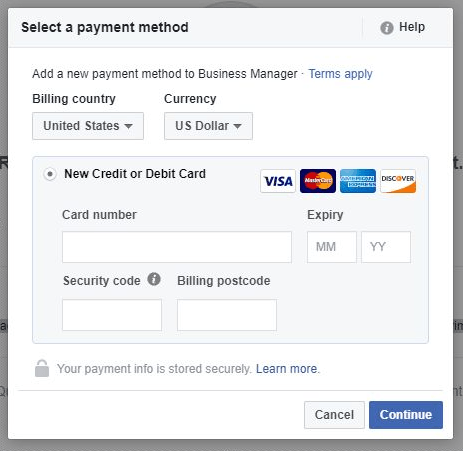
Choose “Ad Payment Method” and fill in your billing details.
Business Info
Under the “Business Info” tab you will find all information available about your Business Manager. Here you can edit the name of your Business Manager, the associated picture, and the primary Page, you can turn on or off notifications.
Notifications
Here you can set up the activities you’d like to receive notifications for.
Requests
Under this tab you can find and manage all the access requests that have been made. You can choose to either accept or delete a request.
Securing your Business Manager
Facebook offers Business Manager owners with an extra layer of security; two-factor authentication. By enabling this feature anyone accessing your Business Manager from a new device will be asked to enter a special code. In order to receive these codes you need to add your phone number to your personal Facebook account.

In order to enable two-factor-authentication click the “Business Settings” button located in the upper -right corner. Click on the “Business Info” tab and click on the “Edit” button.
On the next section, is where you can enable the two-factor authentication and also specify if admins or everyone who has access will be required to go through this process. Choose the option you want and save the changes.
Business Manager is a great and powerful tool for agencies and advertisers. I hope this guide will make it easier for you to get started and harness the power and ease that this tool has to offer.