Over 130 million accounts on Instagram tap on a shopping post to learn more about products every month. If you are an e-commerce company with a presence on Instagram you should definitely take advantage of this opportunity and optimise your Instagram account for shopping. You can do so by tagging your e-commerce products on your Instagram posts and stories. This is also known as creating Instagram shoppable posts and stories.
What is a shoppable post? Types and examples
A shoppable post looks like a regular post where displayed products are tagged and link to the seller’s website. You can create two types of shoppable Instagram posts:
- A shoppable Instagram post
- A shoppable Instagram story
What do shoppable Instagram posts look like?
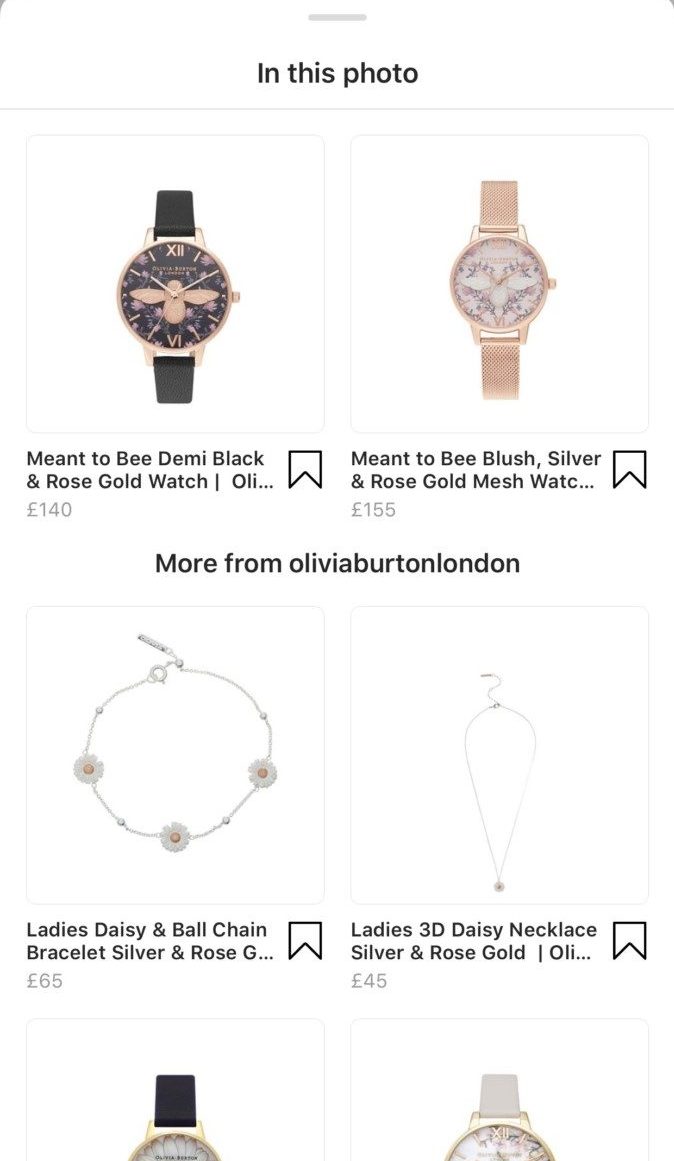
You can identify such posts from a “shopping bag” icon located on the lower, left-hand corner.
By clicking on the photo, a bubble will pop up containing the product’s name and price.

By clicking on the shopping bag icon, another panel will emerge and display the tagged products but also more relevant products. This enhances discoverability while the user in ON your Instagram profile.
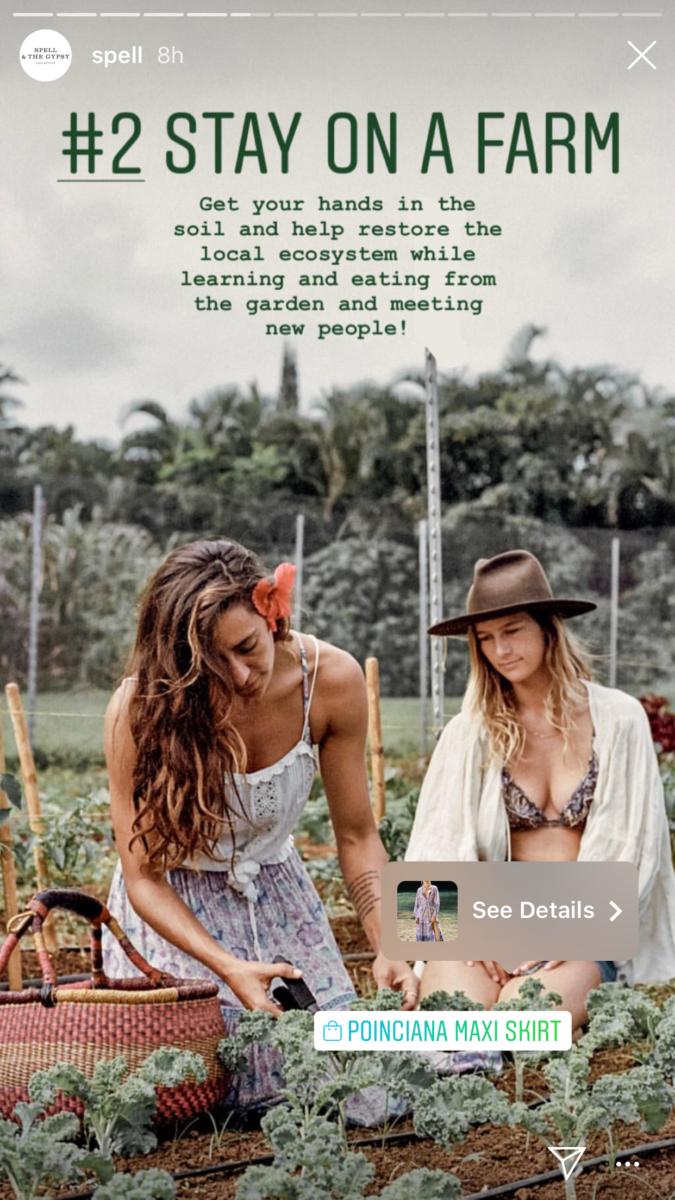
What do shoppable Instagram stories look like?
This type of Instagram story looks like a typical story but the main difference is that it contains a shopping bag icon. As with the tagged Instagram posts, you can click on the product to get more information.
How to create a shoppable Instagram post or story
Before you are able to create your first shoppable post, you need to make sure that:
- You have an Instagram business profile – if not, you may need to convert your personal account or start a new one,
- You are eligible for Instagram Shopping,
- You have connected your Instagram account to your Facebook page, and
- You have a product catalogue in place.
Submitting your Instagram account for review
Once you have your Instagram Business account, the next step is to submit your Instagram account for review. You can do so by visiting your profile’s settings. Click on “Business” and then “Shopping on Instagram”. Follow the steps to make sure everything is OK and submit your account for review. The review process doesn’t take more than a couple of days.
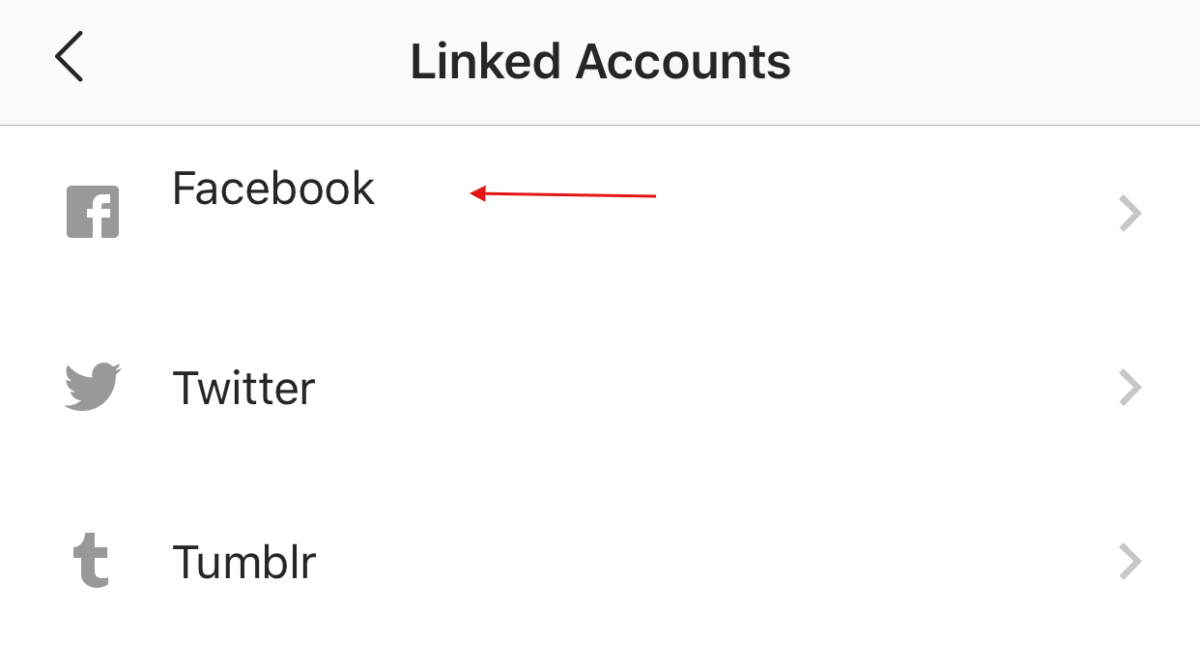
How to connect your Instagram Business Account to your Facebook Page
In order to connect your Facebook Page and Instagram Business Account you need to:
- Go to your account’s Settings
- Tap Account > Linked Accounts, then select Facebook. You may be asked to enter your Facebook credentials
Have in mind that by default, the selected Instagram account will be connected to your personal Facebook Profile. To remove this connection you need to choose a Page that you have access to.
How to create a Product Catalogue for your shoppable posts and stories
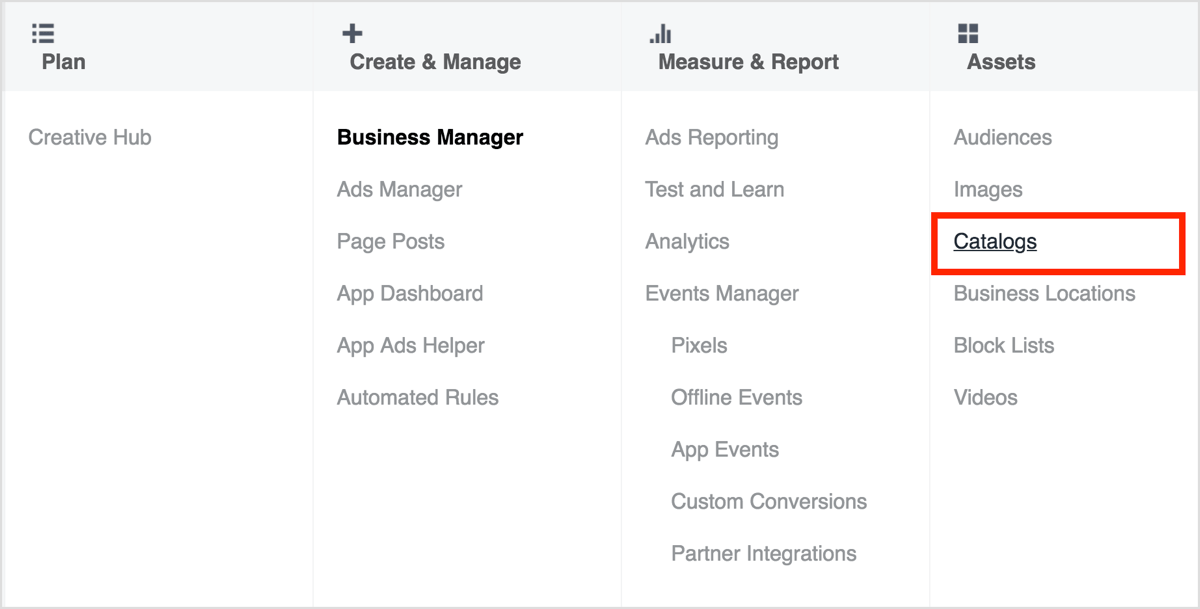
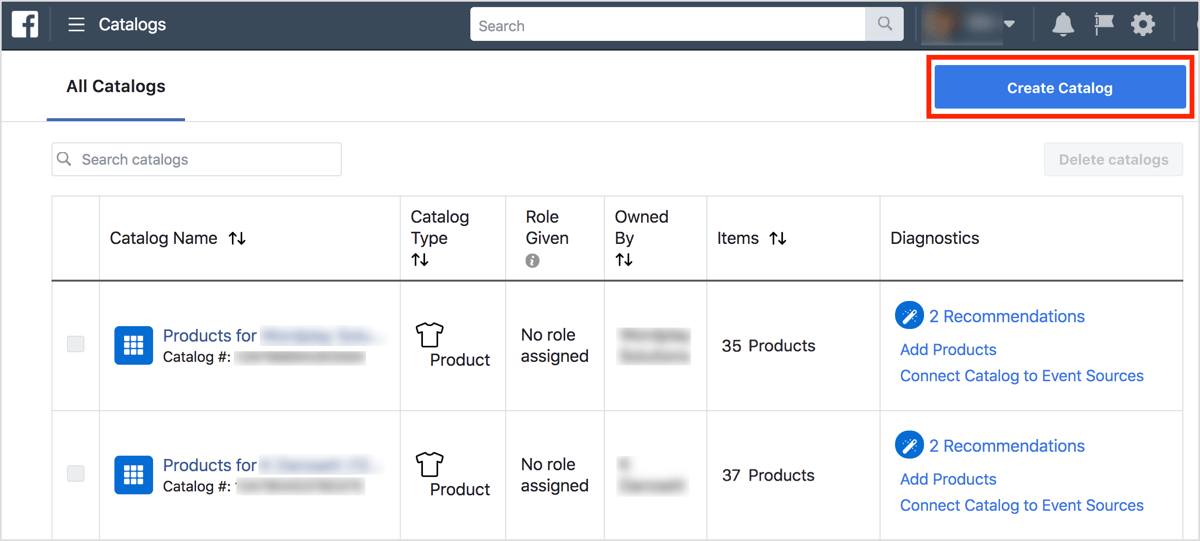
To create a Product Catalogue you need to access the Catalogue Manager. To do so, open Business Manager and select Catalogues or go directly to https://www.facebook.com/products. If you don’t have a Business Manager, you will be prompted to create one.
Next, click the Create Catalogue button.
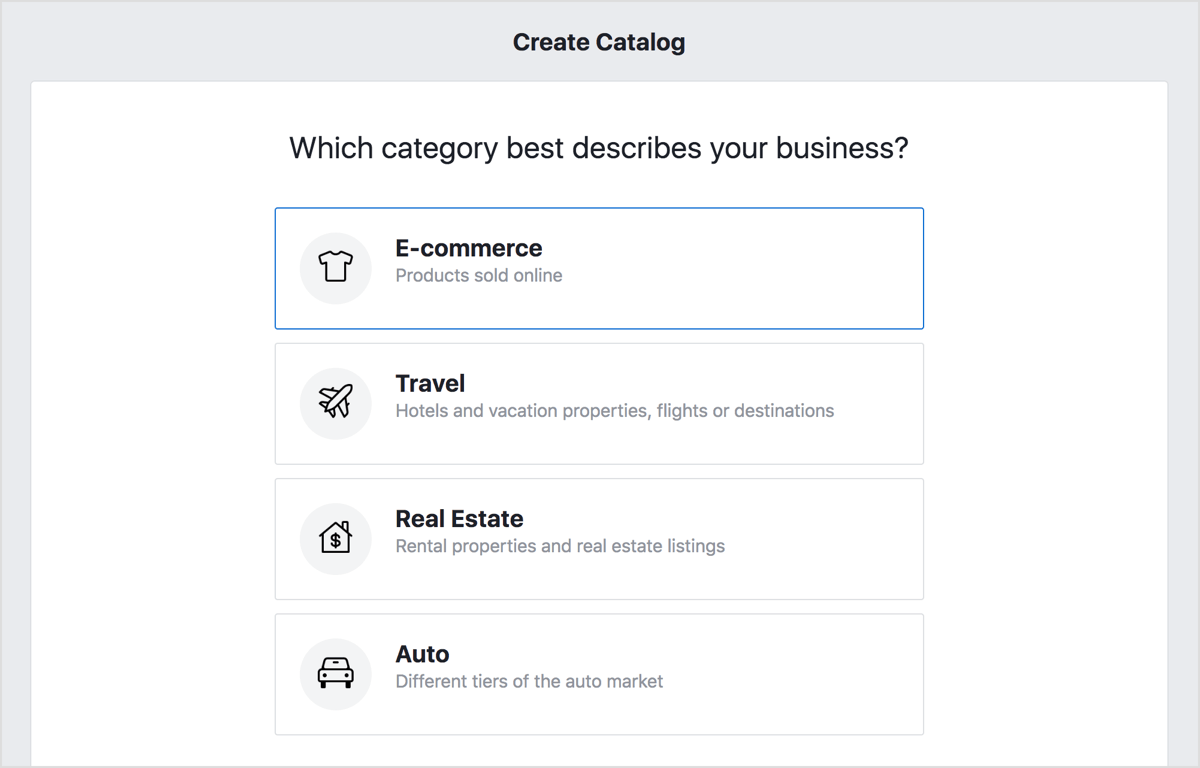
Then choose the E-commerce option and click Next.
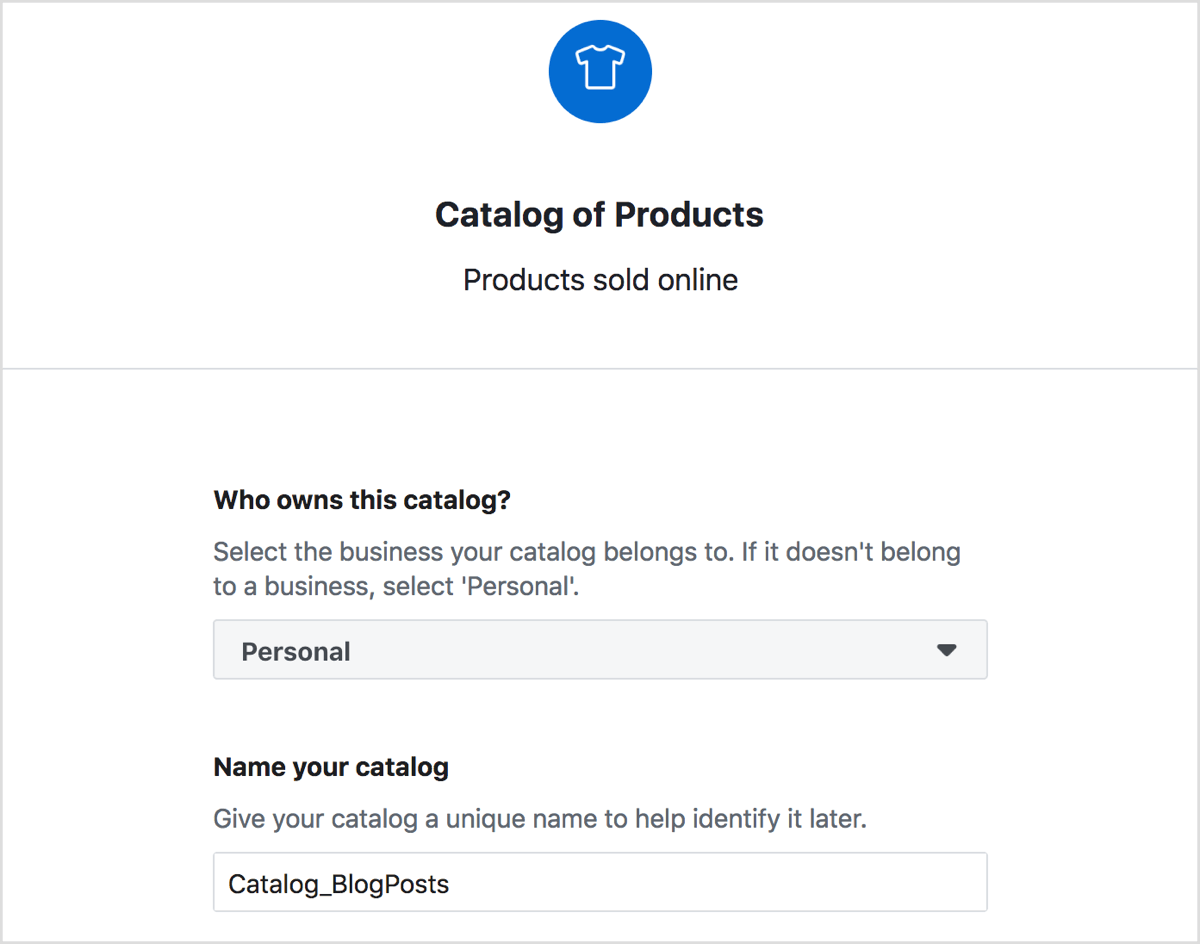
From the drop-down menu, choose the owner of the Product Catalogue. If it doesn’t belong to a business, select Personal. Then enter a descriptive name for it and click Create.
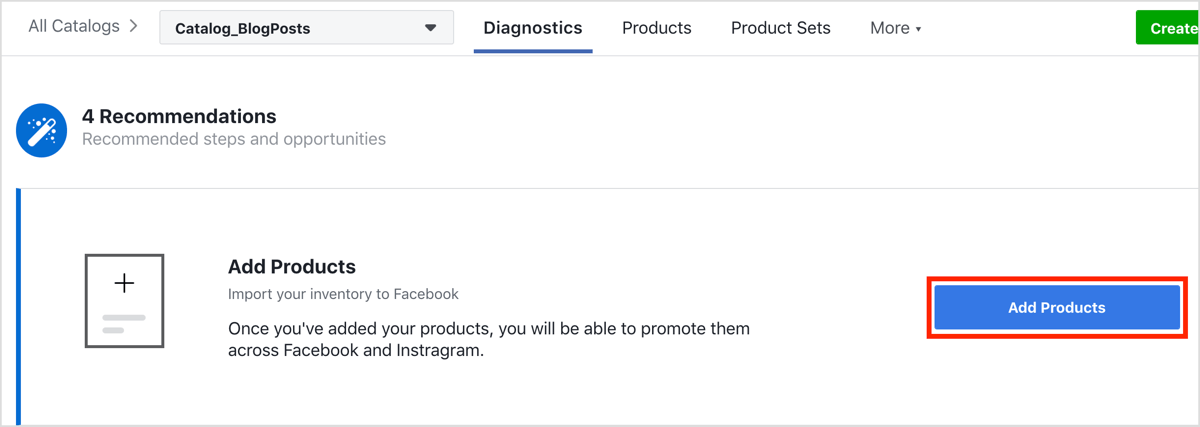
On the next screen, click View Catalogue.
Now you’re prompted to add products. Click the Add Products button.
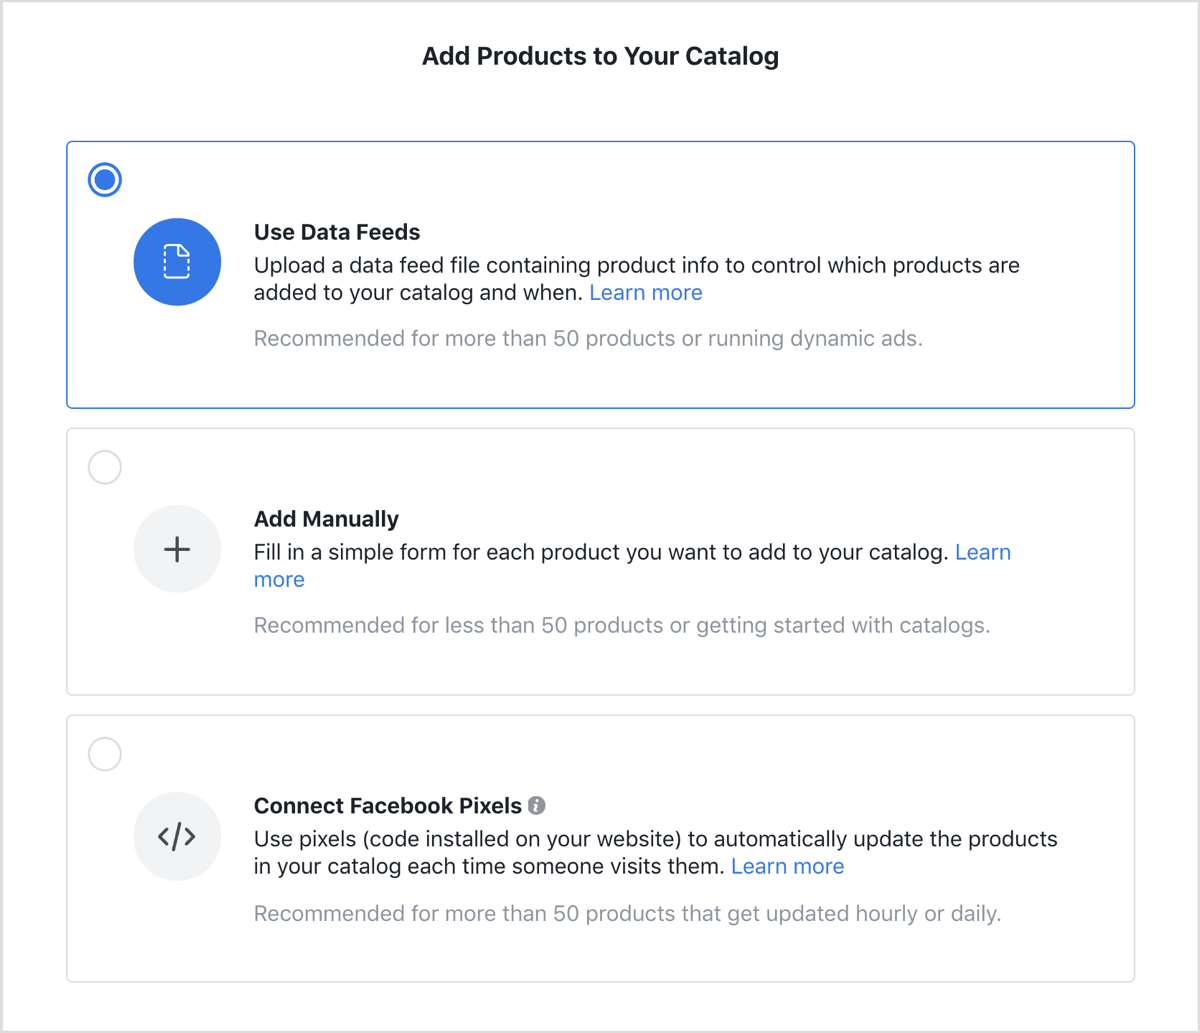
You can add products to your Product Catalogue by choosing one of the below options:
- Use Data Feeds: Use this option if you have a product feed (see here if you want to create a Data Feed using spreadsheets .I will be using this option).
- Add Manually: This option is ideal if you have a small number of products.
- Connect Facebook Pixels: This is a great way to create a catalogue if you have a lot of products. When someone views a product, the pixel fires and the product is automatically added to your catalogue. This process requires the implementation of microdata tags.
Choose Use Data Feeds and click Next, if you already have a feed.
When done, ensure the catalogue and feed are set up correctly and that your Facebook pixel is connected to the catalogue. This is important because the pixel will help show more relevant articles to your audience.
If you are a Shopify or Big Commerce user, you can create a Facebook Product Catalogue within your Shopify or Big Commerce account.
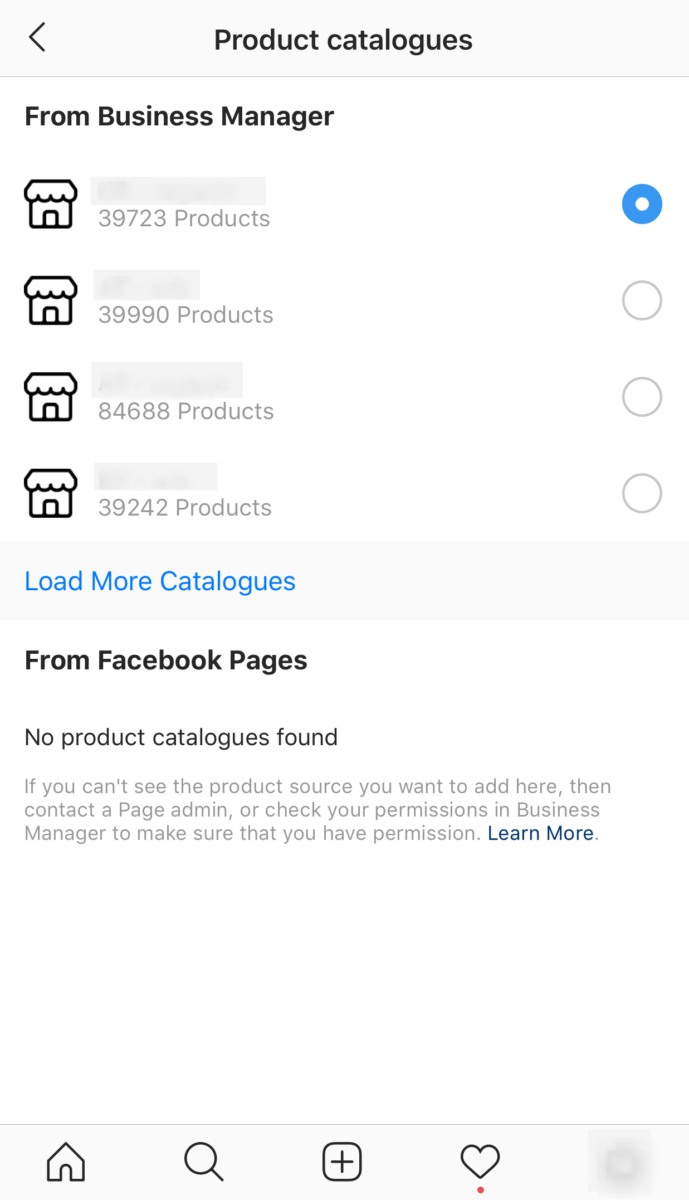
Connecting your Product Catalogue to your Instagram Business Profile
Now that you have created your Product Catalogue, you need to connect it to your Instagram Business Profile.
Head over to the Settings > Business > Shopping and then choose the right Product Catalogue from your Business Manager.
Creating your first shoppable Instagram post
Once the next two steps are completed, you can create your first shoppable post.
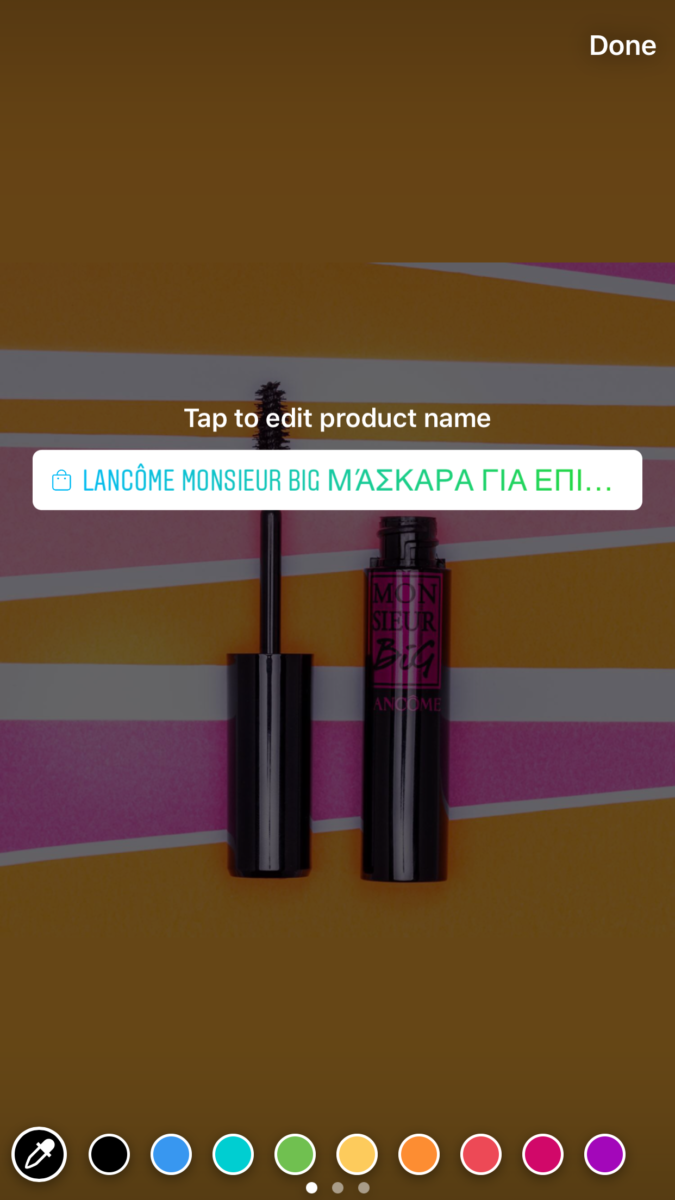
Head over to your Instagram account, compose a post the way you’d normally do, and then click “Tag products”.
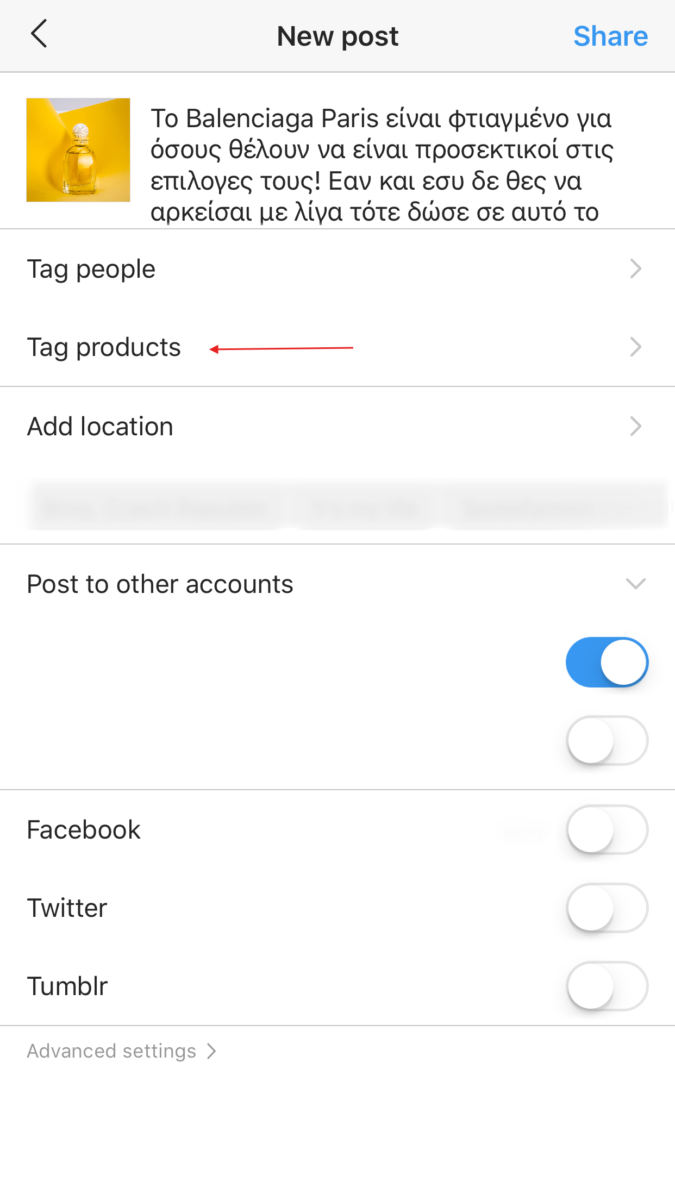
Next, click on the product and find it on the Product Catalogue. You can do so by either inserting the product id (this means that you have found and copied the right product ID and then pasted it on the search box) or by searching the product name. The latter one will display all occurrences of your product name, if any, and you can choose the right one.
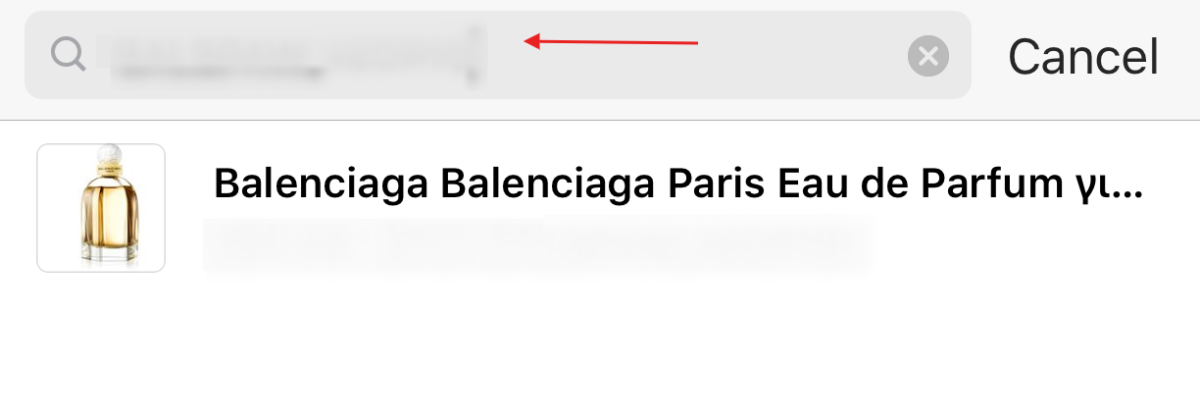
Once you click on the right product search result, you want to make sure that you have tagged the right product (in case more than one product is shown in the image). If you haven’t, you can press and drag the bubble to move it around and place it where it should be.
The shopping bag icon on the lower left side denotes that you have successfully tag your product.
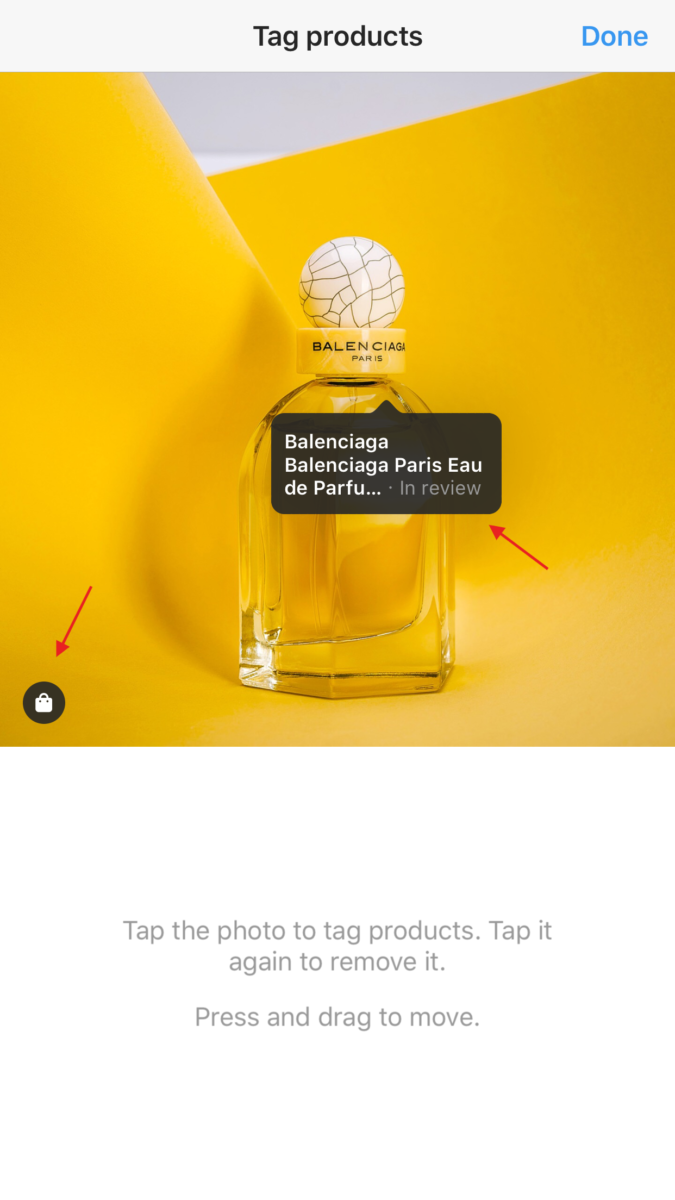
Once you are pleased with the final result, click “Done” to continue with post creation process as usual – adding location, hashtags, etc. Have in mind that you cannot tag both products and people on the same post!
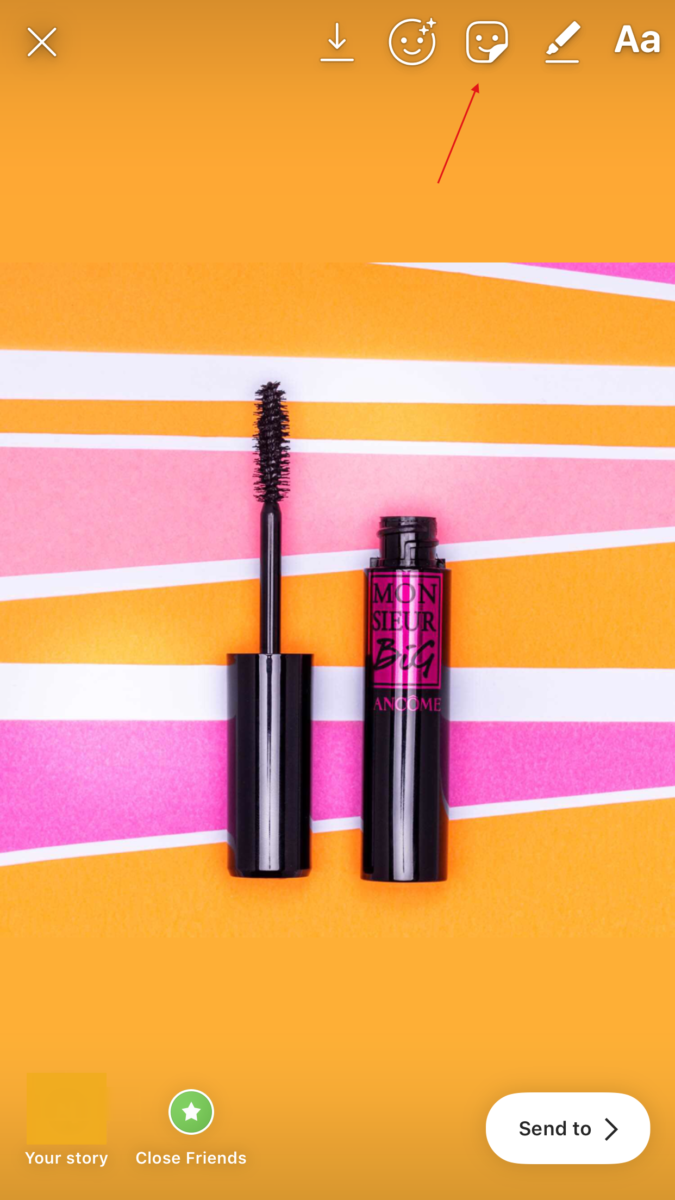
Creating your first shoppable Instagram Story
Tagging products in your Instagram Story is a rather straightforward process. Create an Instagram story the way you normally do and click on the “Stickers” option.
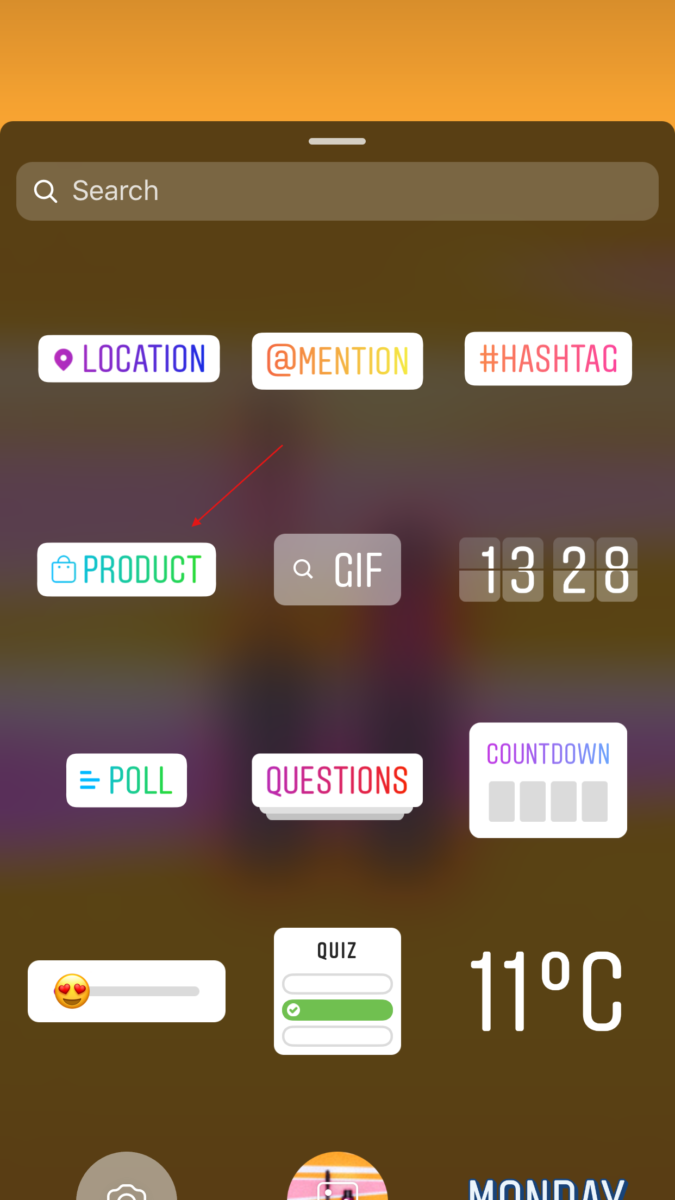
Use the “Shopping” sticker to tag your product
Next, use the product ID or the product name to find the product you want to tag.
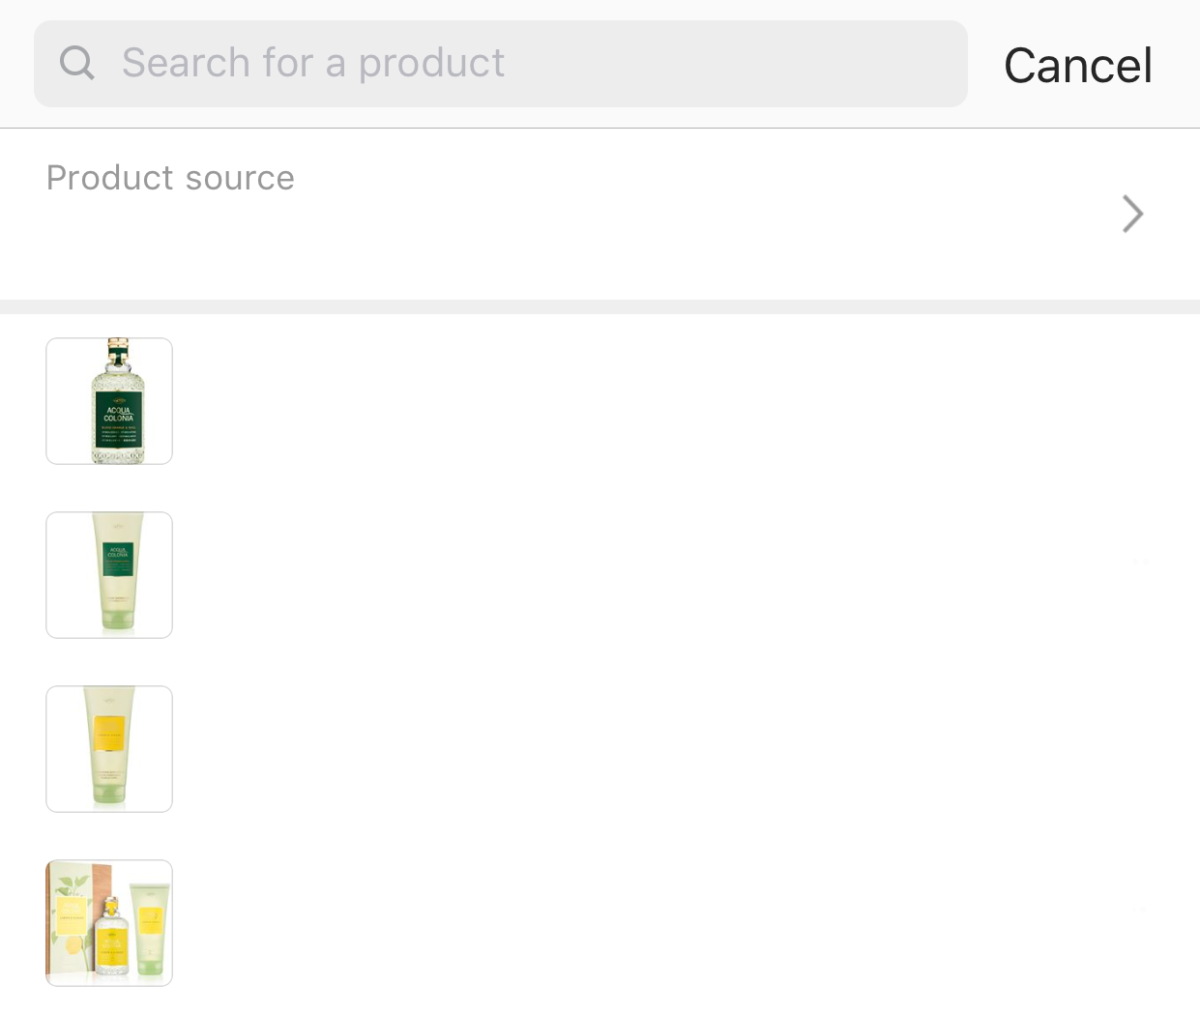
Choose the right product and finish the Instagram story-publishing process the way you normally do.
There you have it! You just created your first shoppable Instagram story.
Creating shoppable Instagram post for multiple countries
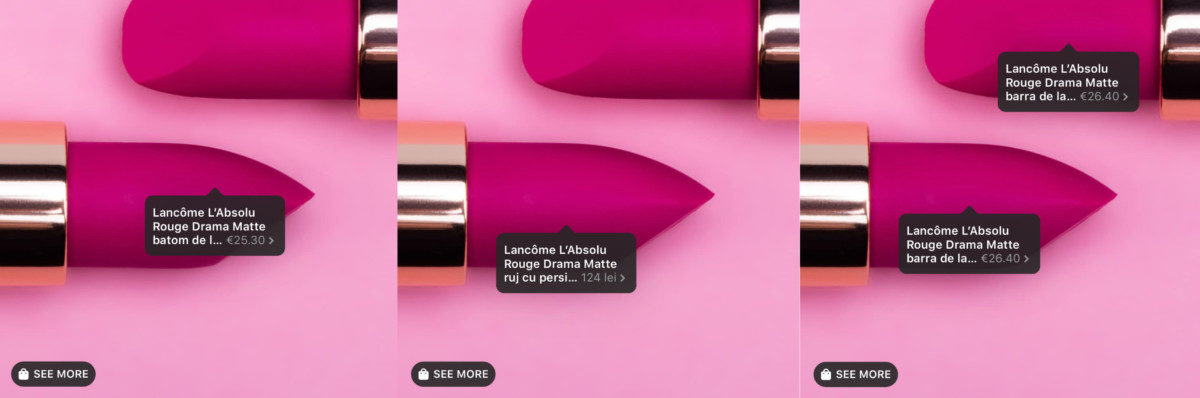
If you are a brand with a presence across multiple countries where a variety of currencies and languages are being used you can localise your shoppable Instagram posts and stories to cater to particular countries/audiences.
To be able to create shoppable posts in each country using its currency and/or language, you need to have a localised website you can direct people to; i.e., if you want to create a shoppable post for Italy, you need an Italian version of your website where the Italian language and euro are used.
Depending on the countries you are targeting and their differences (language only, currency only, or language and currency) you need to create secondary product feeds. This means that besides your main product feed where ALL of your products are located you need to create:
- A secondary product feed for multiple currencies. In this feed, you will provide the price and currency you want to be displayed for every product in your Product Catalogue. This is ideal if you want to show product information in one language, eg., English, but use different prices/currencies.
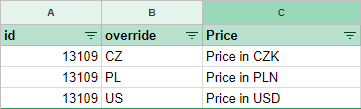
- A secondary product feed for multiple languages. In this feed, you need to provide a product description for each language. This is ideal if you want to show product information in multiple languages but use the same price/currency across countries.

- A secondary product feed for multiple languages and currencies. In this type of feed, you can “merge” currency/price and language information to display products in multiple languages and prices/currencies.
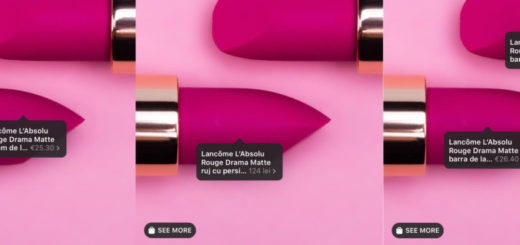
By implementing any of the above, you can create Instagram shoppable posts and stories like the ones below.
By tagging your Instagram posts and adding product stickers to your stories, you can help potential shoppers browse, discover, and buy directly from your Instagram Business Profile.