Facebook makes a stand against the spread of misinformation and false news on their platform and will be removing the ability for any Page to edit how a link appears.
In their efforts to fight fraudulent content and make channels, that have been using click-bait practices, comply with their mission, Facebook will soon be removing the ability to alter a link’s headline, description, and image from all link sharing entry points on Facebook. It has been a common practice for many Page admins and advertisers to edit a link’s metadata that Facebook generates automatically, in the case of a non-attractive picture, a non-clicky title or even a long description.
Although Facebook will be deprecating this functionality soon, fortunately, there is still a solution to customize your links. Here are 3 ways how to do so:
- Creative Hub – In Creative Hub you will find some of the capabilities from Power Editor and Ads Manager that will allow you to create ads with the possibility to edit the links.
- Power Editor – There is also a trick here. You create an ad the way you usually do and once you’ve published it, you can go to the “Ads Post” section and publish it as a post on the page. You can then pause or delete your ad. By first passing through the ad review system, Facebook gets the assurance that the post will be of high quality and will give it a green light.
- Link Ownership – Publishers have the option to use the “Link Ownership” feature until September 12, which can be found under the “Publishing Tool” section. You can find all the information about the Link Ownership option and editing links in Facebook Help.

For many sites, however, the solution will be to modify their webpage in order to generate the “correct” metadata while including the link to a post. If you are editing content that you have already published, you can run your URL against the on the Sharing Debugger Tool, which will show you the new form of your link.
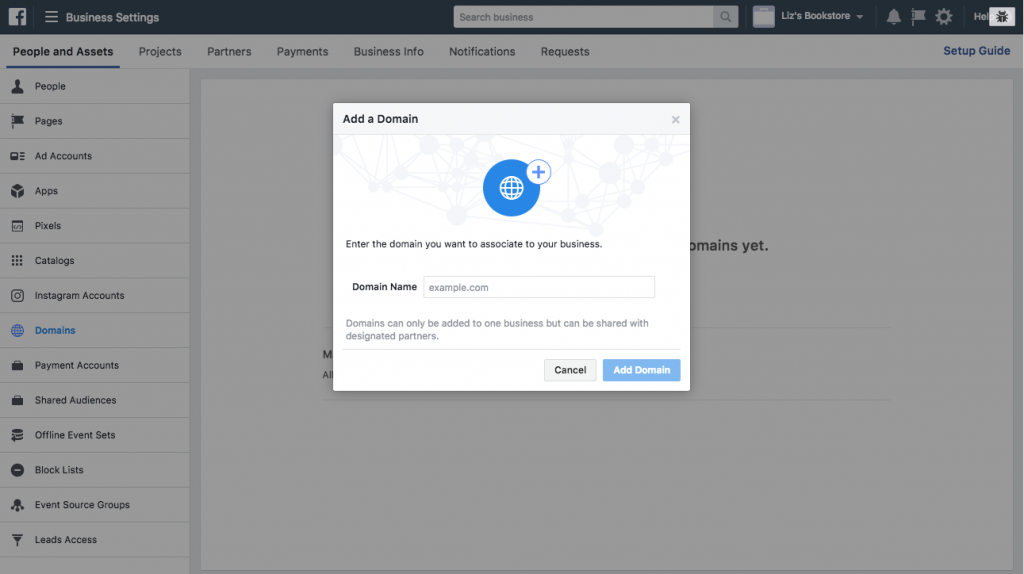
UPDATE: There’s one more way to edit link previews and that’s through domain verification. In order to verify your domain, you need to have a Business Manager in place and you to have both admin access to the Business Manager and to the Website since some file uploading will be required from your part.

Click on “Domains” option on the left and choose “Add a Domain”. Once you add it you can choose the method you wish to use to verify your domain: DNS Verification or the HTML File Upload.
What do you think of the news? Do you have other tips on editing a shared link?


